


Welcome to the super fancy and very official Real DIY Barn Door Hardware Installation Guide! So you've purchased your first barn door and/or hardware kit. Both have arrived in pieces on your doorstep, and you may start to feel uncertain of what you've gotten yourself into. Well, worry not my friends. Take a breath and relax, because by the time you finish this guide, you'll be a pro.
Chapter One: Barn Door AssemblyWe know that the idea of assembling your own barn door may be daunting. Trust us though, you can do it, even if you don’t see yourself as the sharpest tool in the shed.

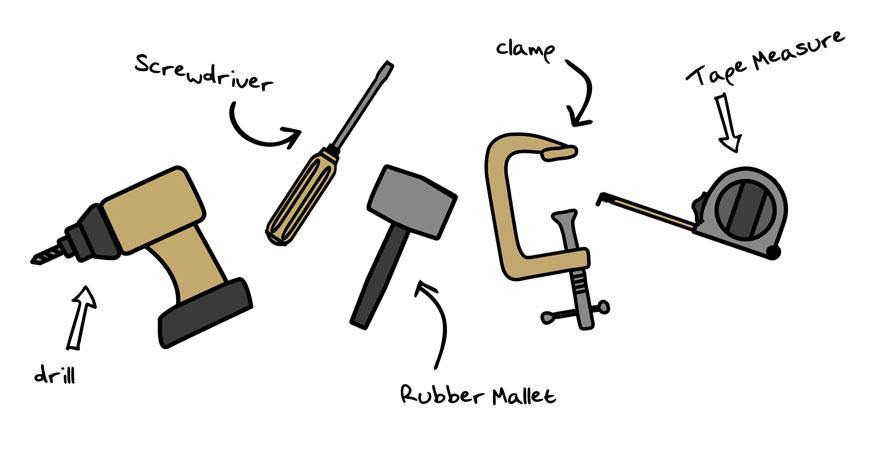
Speaking of tools, you're going to need a few. To build your, door you will need:
1) Tape Measure
2) Power Drill
3) Some Clamps
4) Rubber Mallet
5) Slotted Screwdriver.
Alright, here we go!

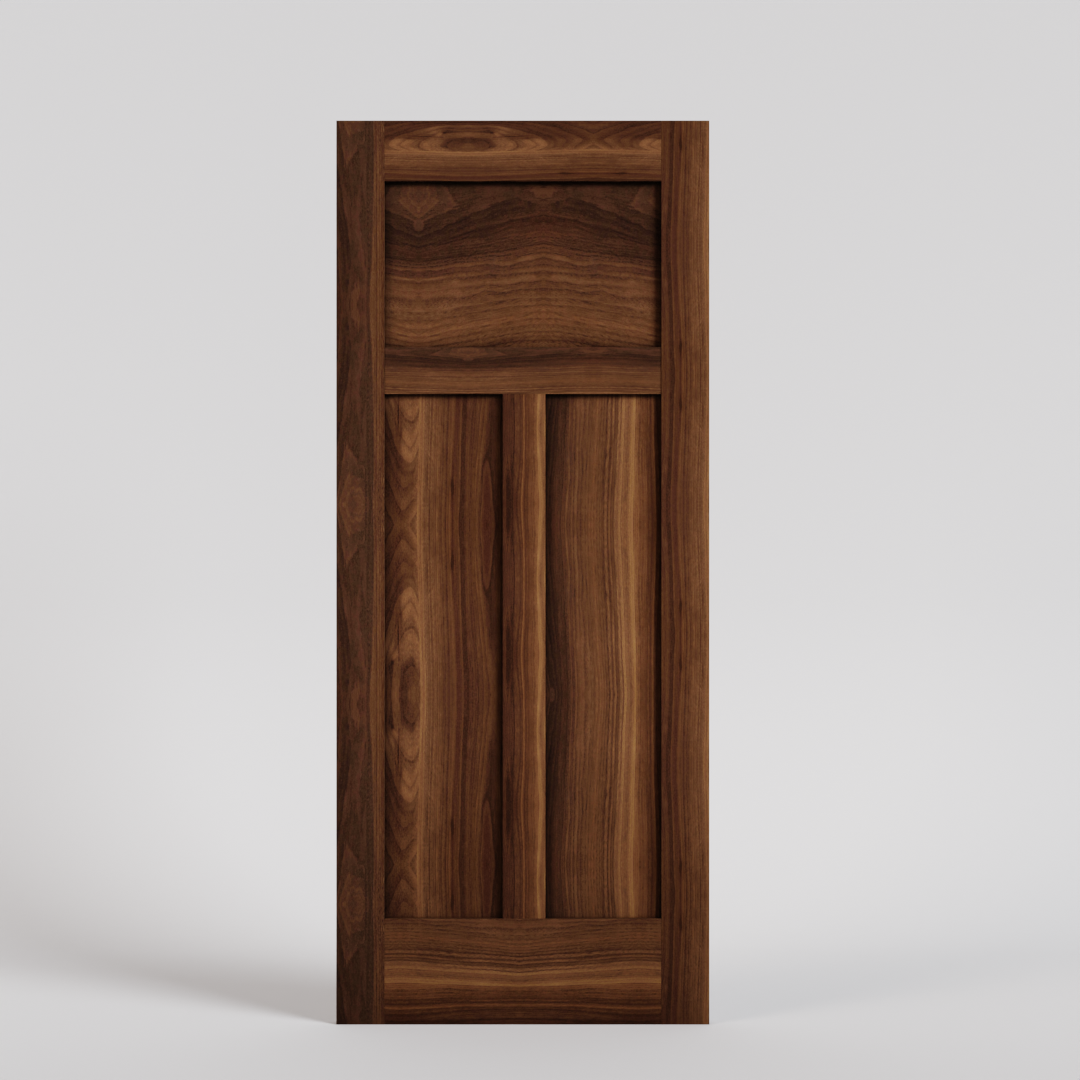
The pieces of your door are each labeled with a letter system, so you may want want to lay them out and get them all organized. Your pieces may look slightly different depending on the style of door you chose, such as our traditional double-Z barn doorversus a more modern door, but should look similar to the picture above.

Fit the spline (D) snug into the slot in the end of plank (A). Then fit the mid plank (B) onto the spline assembly. Continue fitting the splines and planks together making sure the keep the board ends lined up (this is when all that time spent playing with Legos as a kid will finally come in handy).

Next, while your door’s planks may love each other, they still need some space. With the planks assembled, insert the spacers in between the boards. The spacers should be inserted at the top and bottom of the door 9-12” from the edge. After you insert the spacers you can use your rubber mallet to line everything up perfectly. After that, you'll want to arrange all face boards on the door according to your chosen design. For the sake of this walk through we are using the Z brace style. Clamp the top and bottom rails ( C ) securely to the door. Make sure everything is all lined up.

Install the included drill bit onto your drill with 1-1/4” of the bit extending from it. Drill the pilot holes through the countersink holes in the rails making sure not to drill deeper than 1-1/4”. Then you can insert your screws. Make sure not to over tighten them!

You’ve done it! Remove your clamps and your door is ready to go! Now you can hang it up onto your Real sliding hardware. More of a visual learner? Want to watch someone else do it first? No sweat, take a look at our assembly video:
Chapter Two: Real Sliding Hardware Assembly

If you also ordered a Barn Door Soft Stop, please read How to install a barn door Soft Stop in 5 easy steps before continuing.
Now that your door is all set up, you are going to need something to hang it on! I know the bits and pieces may be a bit intimidating, but we can break it down and make it easy for you:

Before mounting the track, measure and make sure there will be enough room for the top of the hanger. The Following table shows the minimum clearance needed between the top of the door and the ceiling.

For this project you will need a drill and a router. If there is not enough support (i.e., blocking or head casing) for the weight and movement of the door(s), then you will need to add some structural support. Follow these steps to add support to an unfinished or finished wall.

1. Decide which direction you wish to open the door and add, or install structural support in that direction.
2. Check the length of the track(s) and determine the number of blocks you will need. Keep in mind the suggested door-to-frame overlap of 1” per side for doors up to 54” and 2” overlap per side for larger doors.
3. Cut the 2 x 6 block(s) to the correct length(s) between the wall studs.
4. Place the blocking at the appropriate height. Note: Add two (2”) inches to the height of the door, this is the ideal center of the blocking.
5. Position the wide face of the blocking so it is flush with the front surface of the wall studs.
6. Securely fasten the blocking to the wall studs.

Finished Wall
The maximum door weight rating for attaching a door to head casings alone with no wall blocking, is 75 lb. (see unfinished wall section for installing structural support for heavier doors). The head casing must be a minimum of 1” thick and it is recommended it be a hardwood such as oak or poplar. We also recommend that you paint or stain the head casing before attaching it to the wall.
1. Determine which direction you wish to open the door. Then follow the directions below.
2. Check the length of the rail(s). Cut the head casing to the desired length. Note: The length of the head casing can be oversize if desired.
3. Using a stud-finder, find and lightly mark the location of the wall studs.
4. Place, and level, the head casing.
5. Securely fasten the head casing to the wall studs at the marked locations.

All hanger styles besides Aero require a minimum clearance of 3/8” between the door and wall / existing molding. See the table below for typical standoff arrangements. Recess the bolt heads, or use standoff extensions to achieve the necessary clearance.

While your hardware may be sturdy, it does have its limits. The hardware is rated to handle a maximum door weight. Make sure to not attach a door that exceeds the weight capacity of the hardware.

Cut the T-Guide Slot (T-Guides Only)
Bottom guides keep your door from swinging in and out. There are three types of bottom guides, the T-Guide, C-Guide, and the Wall Mounted Stay Roller. Of the three guides, only the T-Guide requires door preparation. Follow these steps to cut the slot for the T-Guide:
1. Securely clamp the door. 2. Using a router with 1/4” slot cutter, cut a slot that is 5/16” wide by 1/2” deep. Several passes of the router will be needed.
2. Using a router with 1/4” slot cutter, cut a slot that is 5/16” wide by 1/2” deep. Several passes of the router will be needed.

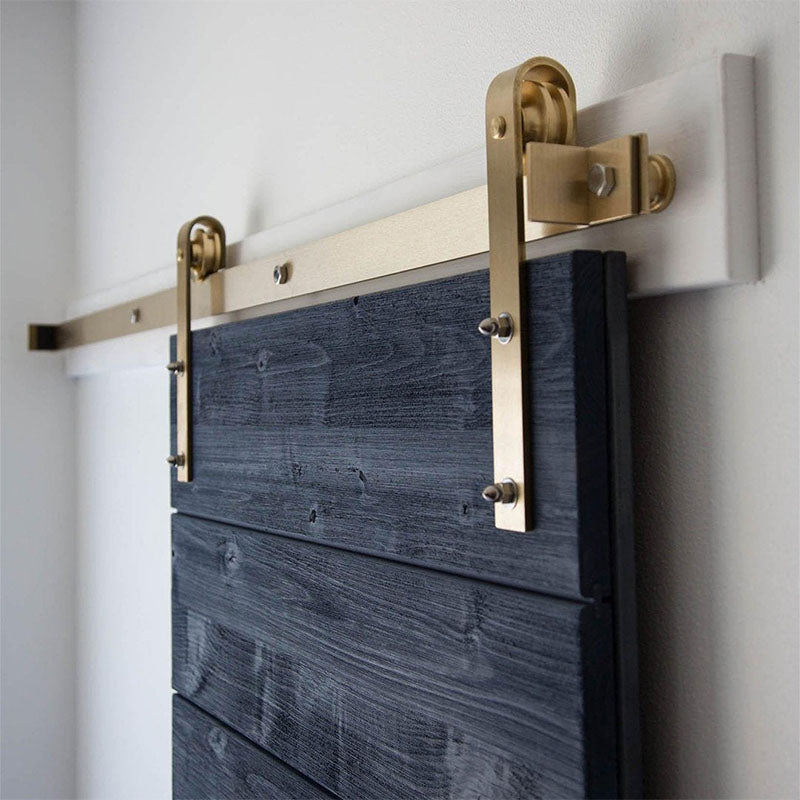
Attaching the Hangers (Except Aero)
There are five types of hangers for the flat track system. All of them, except Aero, require mounting holes drilled through the door. Use the chart above to select the correct drill bit for the mounting holes.
Do not drill side mounting holes if you have Aero hardware. Classic, Prop, Hammered, and Horseshoe hangers are mounted on the front (outside face) of the door. Follow these steps to attach the hangers to the door:
1. Place the hanger (with 2 1/2” spacer set into groove of wheel) on top of the door. You can use stiff cardboard if needed. 2. Position the hanger the desired distance in from the outside edge of the door.
Two (2”) inches is a recommended distance from the outside edge of the hanger and outside edge of the door for all hangers.
3. Place a square against the hanger and square the hanger to the door.
4. Mark the hole positions.
5. Setup your power tool with the correct drill bit.
6. From the face to the door, drill a pilot hole through the face of the door.
7. Drill the clearance hole.
8. Place the hanger over the mounting holes and square it to the door.
9. Insert the correct hex bolts and washers from the back of the door.
10. Place the cap nut and washers on the bolt and securely fasten.

Mounting the Track to the Wall
Follow these steps to mount the track for a single door installation: 1. To locate the position of the first mounting hole on the track:
a. Mark where the closed position of the door will be and measure 1 1/8” in from this point.
b. Mark the location of the first mounting hole.
c. Calculate the distance from the floor to the track mounting holes. Mark the position for the first mounting hole.
Track Mounting Hole Calculation for Classic, Prop, Aero, Hammered, and Horshoe:
1/2” (Guide Clearance) + Door Height + 1 1/2” (Distance from top of door to mounting hole) = Distance from floor to track mounting hole

Drywall Anti-crush Rings
You can mount the track with, or without, Drywall Anti-crush Rings.
If you are mounting the track without Drywall Anti-crush Rings:
a. Pre-drill 1/8” diameter pilot hole for the first mounting hole.
b. Drill a 3/8” diameter hole for the first mounting bolt.
If you are mounting the track with Drywall Anti-crush Rings:
With proper blocking behind the drywall, you can mount the track(s) on top of the drywall or use Drywall Anti-crush Rings. Note: The optional Anti-crush Rings come in 1/2” and 5/8” thickness.
a. Use a 1 1/2” spade/paddle bit and drill a clean hole through the drywall until you reach the blocking.
b. Insert the Drywall Anti-crush Ring (sold separately).
c. Pre-drill 1/8” diameter pilot hole for the first mounting hole.
d. Drill a 3/8” diameter hole for the first mounting bolt.
e. Hold the track to the wall. Loosely screw the track in place.
f. Level the track and mark the remaining mounting hole locations.
Note: If multiple tracks (i.e., 10 ft., 12 ft., 14 ft. kits) are being installed for a single door, then you may use a Splice Plate to connect the tracks.
g. Repeat step 2 on the remaining mounting holes.
h. On the first mounting hole, remove the track. Place a Standoff (and extensions, if using) behind the track and place an End Stop on the track. Note: Depending on your installation you may have a Fixed End Cap or an Adjustable End Cap. Follow these steps to attach the appropriate end cap.

If you are attaching a Fixed End Stop:
a. Place an End Stop over the mounting hole (with the cushion pad facing the center of the track).
b. Loosely screw the Lag Screw into the wall.
c. On the opposite end mounting hole, place a Standoff (and extensions, if using) behind the track and an End Stop on the front of the track.
d. Place a Standoff behind each of the remaining mounting holes and screw the track securely to the wall.
If you are attaching an Adjustable End Stop:
Important! If your installation requires Adjustable End Stops, they must be first be placed at their proper location on the track, before track is affixed to wall.
a. Loosen the set screws with Allen wrench provided.
b. Slide the Adjustable End Stop on track (with the cushion pad facing the center of the track).
c. Place a Standoff behind each of the remaining mounting holes and screw the track securely to the wall
d. Hang the door(s).
e. Adjust the End Stops to desired final position, and tighten securely with the Allen wrench.
Attaching the Door
Follow these steps to attach the door:
1. Lift the door and place the track into the grooves on the hanger wheels.
2. Move the door from end to end and test how the door slides.
Door Guide Installation
This section provides installation instruction for the following door guides:
• T-Guide
• C-Guide (optional)
• Wall Mounted Stay Roller (optional)
• Industrial Floor Mounted Stay Roller (optional)

Follow these steps to install a T-Guide, C-Guide or Wall Mounted Stay Roller:
1. Plumb, and block, the door so it is square to the floor.
2. Determine how wide the door overlap is (minimum 1”). Note: The door overlap is the distance between the leading edge of the door when fully open, and the trailing edge of the door when fully closed.
3. Mark the centerline of the overlap.
4. Place the guide and slide it to the centerline of the overlap and mark the edges of the base.
5. Remove the door from the track.
6. Re-align the guide to the base markings. Pre-drill and install the guide.
7. Put the door back on the track and slide it to test. If necessary, adjust the guide so it is square to the door.
Follow these steps to install an Industrial Floor Mounted Stay Roller:
1. Plumb, and block, the door so it is square to the floor.
2. Determine how wide the door overlap is (minimum 1”). Note: The door overlap is the distance between the leading edge of the door when fully open, and the trailing edge of the door when fully closed.
3. Mark the centerline of the overlap.
4. Place the guide in front of the door, on the centerline of the overlap.
5. Pre-drill and install the guide.
6. Put the door back on the track and slide it to test. If necessary, adjust the guide so it is square to the door.

Install the Anti-jump Disc
WARNING! Lack of, or improperly installed Anti-jump Disc may result in the door coming off the track and cause serious injury or even death. Installation of Anti-jump Disks are required for safe operation of this hardware.
Installed properly, these discs will keep the door securely attached to the track. Follow these steps to install the Anti-jump Disc on all models except when Aero hangers are mounted on top of the door (not recessed):
1. Locate the screw for the Anti-jump Disc 3/8” of an inch in from the front edge of the door, between the hanger and outside edge of the door.
2. Drill a pilot hole for the screw.
3. Place the Anti-jump Disc on the top of the door and screw in place.
4. Repeat steps 1 through 3 for the remaining hanger.

Follow these steps if the Aero hangers are mounted on top of the door (not recessed):
Note: The Anti-jump disc must be installed after the door is mounted on the track.
1. On the Aero hanger base plate there are two small holes. Choose the one that is towards the outside of the door. Drill a pilot hole for the screw.
2. Place the Anti-jump disc on the top of the door and screw in place.
3. Repeat steps 1 and 2 for the remaining hanger.
You made it through our Real Guide to DIY bard door & hardware installation. Now your door is hung up, secure, and ready to slide! You’ve worked hard, now take a cue from our Z brace door go get some zzz’s of your own. Take a look at our hardware easy install video to see these steps in action. For more information on installation, product care, and mounting Bi-parting doors please take a look at our helpful info section at www.realcraft.com or watch this hardware installation video:
Related Articles:
Barn Door Hardware: How to Select a Style +20 AMAZING ideas!
Get Inspired by these +50 beautiful sliding barn door ideas!
Butcher Block Countertop: +20 ideas to inspire your next project


James Williams
July 13, 2020
Wow, really awesome guide, thank you so much for sharing barn door installation guide. Now its easy to install for me. Looking for more DIY guide from you. By the way, keep up the good work.
Regards
James Williams
https://homerdiy.com/